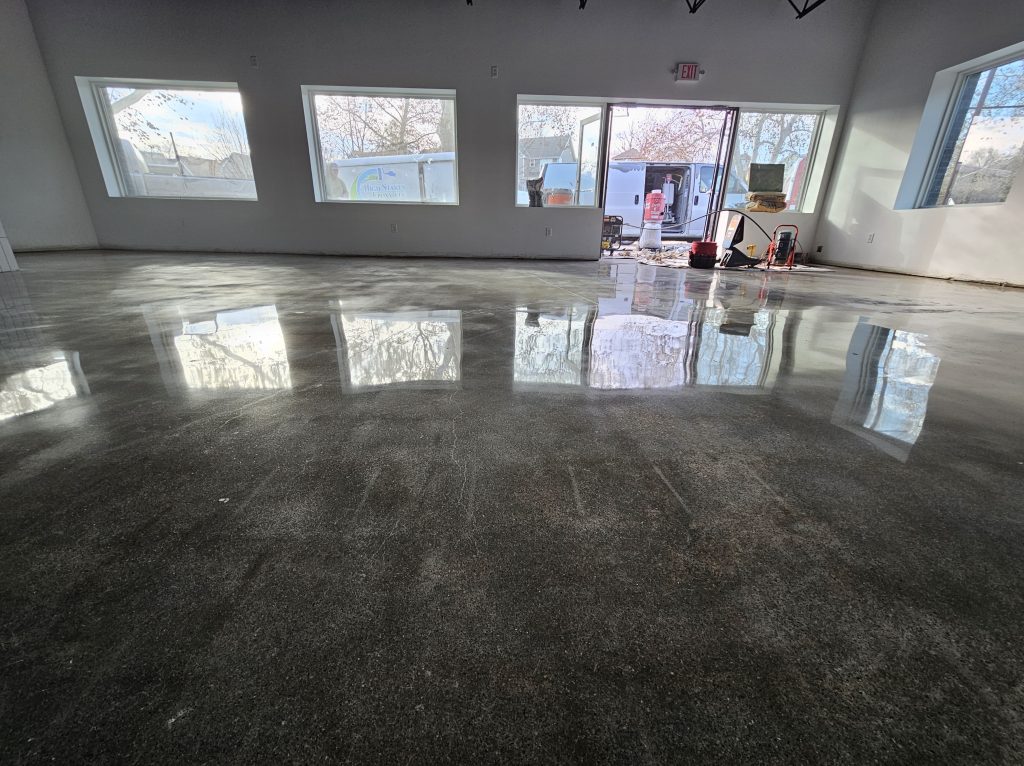
Commercial concrete polishing has become one of the most popular flooring upgrades for Kansas City businesses—and for good reason. Polished concrete delivers durability, low maintenance, improved safety, and a clean, professional look that works for warehouses, retail stores, offices, restaurants, showrooms, and industrial facilities.
If you’re considering polished concrete for your business, it’s helpful to understand the installation timeline and what each phase involves. At High Stakes Epoxy LLC, we follow a structured, efficient polishing process to minimize downtime while delivering flawless, long-lasting results.
This guide walks you through the commercial concrete polishing timeline, so you know exactly what to expect.
⭐ Phase 1: Initial Assessment & Planning (Day 1)
Every successful project begins with a professional evaluation.
During this phase, we assess:
- Current condition of the concrete
- Cracks, chips, or slab damage
- Existing coatings or adhesives
- Moisture levels
- Traffic patterns and usage needs
- Desired sheen level (matte, satin, semi-gloss, high-gloss)
We then create a project plan outlining:
- Necessary repairs
- Equipment needed
- Grinding levels required
- Estimated timeline
- Business downtime and scheduling
This ensures your polishing project runs smoothly from start to finish.
⭐ Phase 2: Surface Preparation (Day 1–2)
Surface prep is the foundation of polished concrete success.
Preparation steps include:
- Removing old coatings, glue, paint, or sealers
- Diamond grinding to open the concrete surface
- Repairing cracks, pits, and damaged areas
- Cleaning the floor thoroughly
- Addressing moisture-related issues
Proper prep ensures the concrete is clean, level, and ready for the polishing stages.
⭐ Phase 3: Initial Grinding (Day 2–3)
This is where the true polishing process begins. We use industrial grinders with progressively finer diamond tooling.
Initial grinding:
- Removes surface imperfections
- Levels the floor
- Begins refining the concrete’s surface
- Exposes aggregate (if desired)
For commercial spaces, this stage sets the foundation for a smooth, durable finish.
⭐ Phase 4: Concrete Densification (Day 2–3)
A densifier is applied to strengthen the concrete and make it more resistant to:
- Abrasion
- Dusting
- Moisture
- Impact
- Wear from heavy machinery
The densifier penetrates deep into the slab, increasing its hardness and longevity. This step is essential for high-traffic Kansas City businesses.
⭐ Phase 5: Progressive Polishing Stages (Day 3–4)
Polishing includes multiple passes with increasingly fine diamond tooling. This step determines the smoothness and final sheen of the floor.
Options include:
- Matte finish – subtle, low reflection
- Satin finish – slight sheen
- Semi-gloss finish – noticeable shine
- High-gloss finish – mirror-like clarity
We tailor the sheen level to the business’s needs—dull for industrial safety or glossy for retail appeal.
⭐ Phase 6: Stain or Color Application (Optional – Day 4)
Businesses that want a decorative or branded look may choose to add:
- Concrete stains
- Dyes
- Colored patterns
- Logo inlays
- Polished concrete with specific hue tones
This step adds customization without compromising durability.
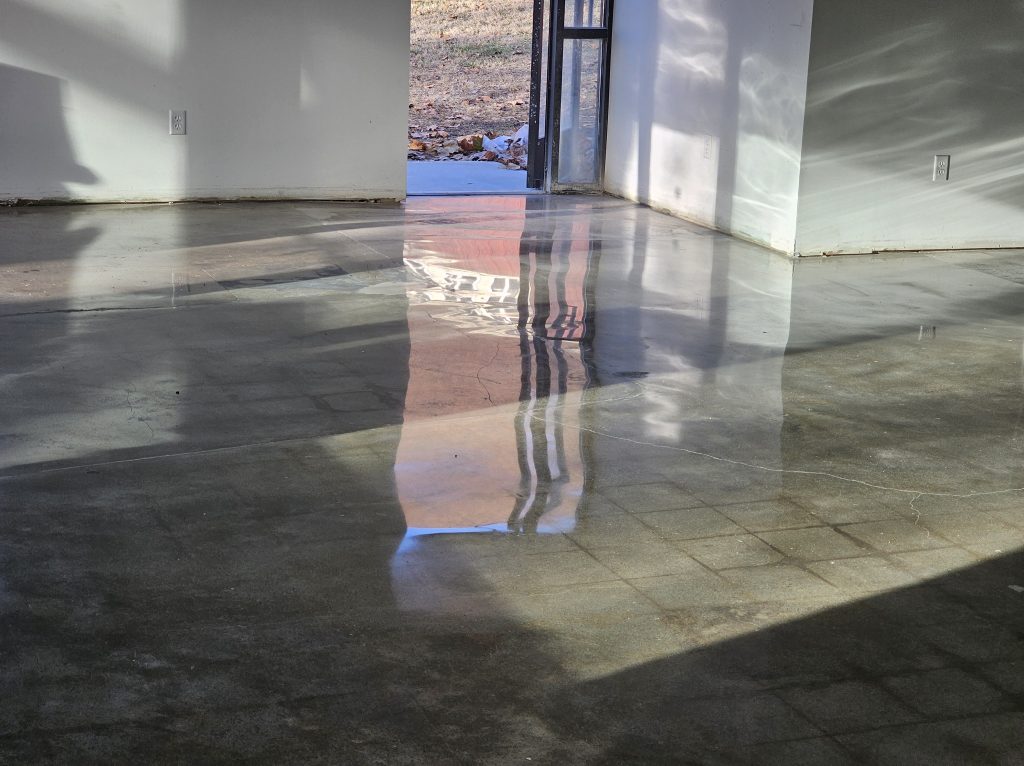
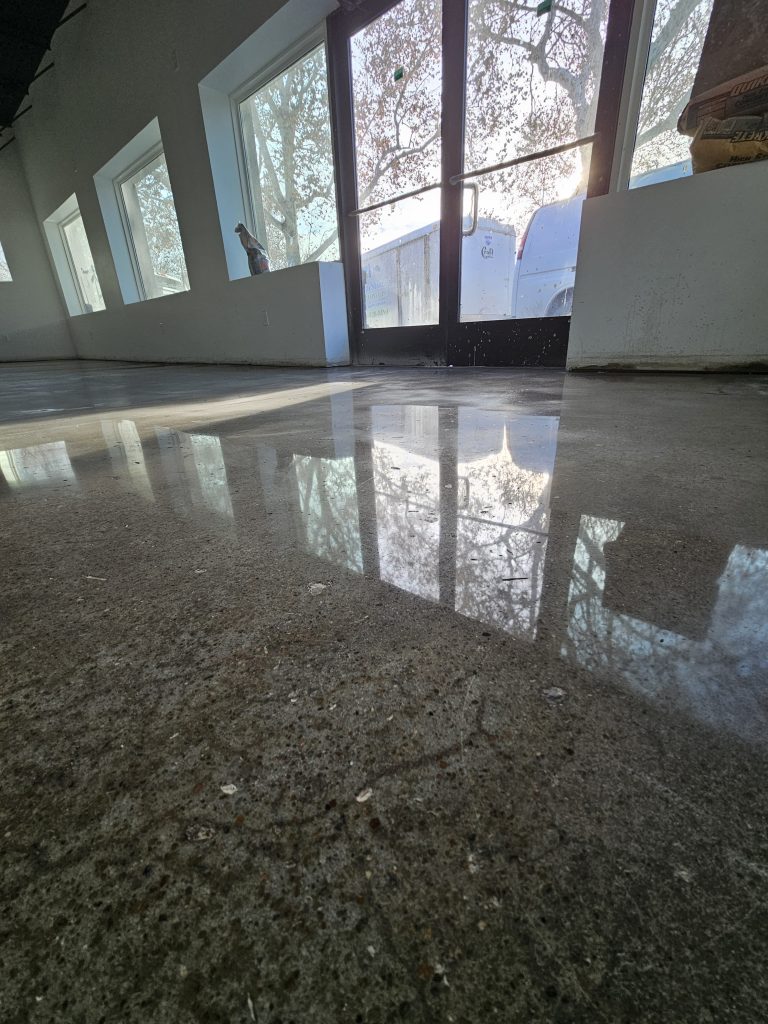
⭐ Phase 7: Final Polishing & Burnishing (Day 4–5)
The final polishing pass refines the floor to its ultimate shine and clarity. Afterward, the surface is burnished to enhance:
- Reflectivity
- Smoothness
- Surface density
- Longevity
This creates the clean, professional look polished concrete is known for.
⭐ Phase 8: Protective Sealer Application (Day 5)
A high-quality commercial sealer is applied to protect against:
- Stains
- Moisture
- Chemical spills
- Wear and abrasion
The sealer enhances the concrete’s appearance while adding an essential layer of defense—especially important for restaurants, retail stores, and industrial environments.
⭐ Phase 9: Curing & Final Walkthrough (Day 5–6)
Once the polishing and sealing are complete:
Curing includes:
- Allowing the sealer to set properly
- Keeping the area free of dust and traffic
- Ensuring proper bonding and durability
After curing, we conduct a detailed walkthrough to ensure:
- The sheen matches your expectations
- The surface is smooth and consistent
- All cracks have been filled
- The floor meets commercial performance standards
We also provide maintenance guidance to ensure long-term performance.
⭐ Total Project Timeline: 3–6 Days
Most Kansas City commercial polishing projects fall within this range, depending on:
- Square footage
- Concrete condition
- Desired sheen
- Repair needs
- Customization (stains, dyes, logos)
Our goal is always to minimize downtime while delivering exceptional results.
⭐ Why Kansas City Businesses Choose High Stakes Epoxy LLC
We specialize in commercial-grade polished concrete systems tailored to high-traffic environments. When you work with us, you receive:
✔ Precision mechanical grinding
✔ Industrial densifiers and sealers
✔ Slip-resistant and sanitary options
✔ Fast, efficient turnaround times
✔ Custom finishes for branding and aesthetics
✔ Floors engineered for durability and longevity
Our team ensures your polished concrete floor performs beautifully for years to come.
⭐ Upgrade Your Business with Premium Polished Concrete
If your Kansas City business is ready for a durable, low-maintenance, and visually impressive flooring system, polished concrete is the perfect solution.
📞 Contact High Stakes Epoxy LLC today for a free commercial flooring consultation!
Let’s build a floor that enhances your operations and supports long-term success.